
Overview
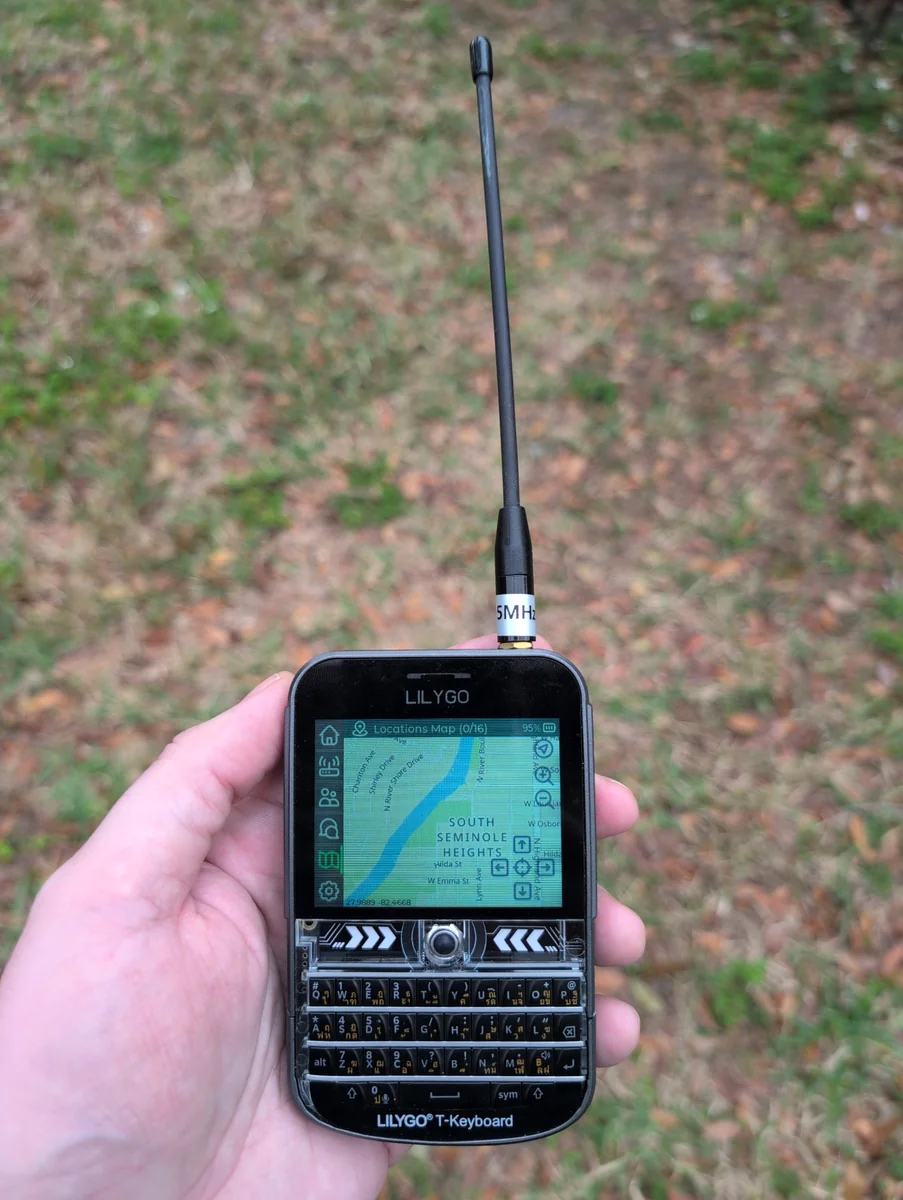
The LilyGo T-Deck Plus (Amazon affiliate link) → is a powerful Meshtastic device with a built-in keyboard, touchscreen, GPS, and LoRa radio. This guide covers the critical configuration details that aren't immediately obvious from basic tutorials, including firmware version selection, the crucial difference between MUI and BaseUI interface modes, how to properly enable Bluetooth connectivity, and how to set up offline maps on your T-Deck.
Firmware Version
Make sure you are on firmware 2.7 or higher so you can take advantage of the MUI (standalone graphical interface) as well as the BaseUI (Bluetooth-capable text interface).
If you need to update the firmware:
With the USB cable disconnected, turn the T-Deck off. While holding down the trackball, turn the T-Deck on, and then release the trackball. The screen will stay blank.
Use a proper USB-C data cable (Amazon affiliate link) → that is capable of data transmission as well as power.
Visit flasher.meshtastic.org in Chrome or a Chrome-like browser.
- Click "Select Target Device"
- Select the LilyGo T-Deck
- Pick the version of the firmware you want
- Click "Flash"
- Read the release notes, click "Continue"
- Select your T-Deck from the pop-up window of USB devices
- Make sure "Meshtastic UI" is checked
- You may wish to do a "Full Erase and Install." If you do this, make a backup first, or be OK with starting fresh.
- Click "Update"
- Once the update is done, disconnect the USB cable and reboot the T-Deck into the new firmware
Understanding Interface Modes: MUI vs. BaseUI vs. Bluetooth Programming Mode
The T-Deck Plus has two distinct operating interface modes, as well as a programming mode. Understanding the difference is critical for proper operation, especially for Bluetooth connectivity.
MUI (Meshtastic User Interface)
| Feature | Details |
|---|---|
| Visual Style | Graphical interface with icons, colors, and visual elements |
| Bluetooth | ❌ Not available in MUI mode |
| Use Case | Standalone device operation without phone app, capable of viewing offline maps |
| When to Use | Field operations where you want a self-contained device with nice visuals |
BaseUI (Base User Interface)
| Feature | Details |
|---|---|
| Visual Style | Text-based interface, minimal graphics |
| Bluetooth | ✅ Fully functional in BaseUI mode |
| Use Case | Device paired with Meshtastic phone app via Bluetooth |
| When to Use | When you want to use the Meshtastic App for configuration and messaging |
Bluetooth Programming Mode
| Feature | Details |
|---|---|
| Visual Style | Just a Bluetooth icon |
| Bluetooth | ✅ Fully functional in Bluetooth Programming Mode |
| Use Case | Pair a device or program your T-Deck from the Meshtastic App |
| When to Use | During initial setup, programming, or firmware changes |
MUI = Nice visuals, offline maps, no Bluetooth.
BaseUI = Bluetooth capability, less visual appeal.
Bluetooth Programming Mode = Pair a device and program your T-Deck via the Meshtastic App.
Pairing Your T-Deck with the Meshtastic App
Install the Meshtastic App
Download the Meshtastic App (iOS, Android, or desktop)
Initial Pairing Process
When pairing your T-Deck for the first time, you'll use Bluetooth Programming Mode temporarily. After pairing, you usually won't need it again (you'll boot into BaseUI to connect from the Meshtastic App).
Enter Bluetooth Programming Mode
Make sure you are in the MUI interface. Tap the Gear icon (Settings)
Scroll down and tap "Reboot / Shutdown"
Tap the Bluetooth icon in the middle of the screen (NOT press and hold). The device will reboot into Bluetooth Programming Mode
Open the Meshtastic App and pair your device using the code on the screen of the T-Deck
You can use the app while in Bluetooth Programming Mode, but this mode is intended for initial pairing / recovery. After you confirm the app connects, reboot into BaseUI for normal operation
Exit Bluetooth Programming Mode by pressing and holding the Bluetooth icon on the Bluetooth Programming Mode screen. The T-Deck will reboot back into MUI
Important: To actually use Bluetooth day-to-day, switch to BaseUI using the steps in the next section
Exit Bluetooth Programming Mode, then switch to BaseUI for normal Bluetooth operation. Bluetooth Programming Mode works, but it's like using your emergency brake to slow down. Technically functional, but not the right tool.
Switching Between Interface Modes
Here's the exact procedure for switching between MUI and BaseUI modes on your T-Deck Plus.
Switching from MUI to BaseUI (Enables Bluetooth if paired)
From the MUI interface, tap the Gear icon (Settings)
Scroll down and tap "Reboot / Shutdown"
Press and hold (don't just tap!) the Bluetooth icon in the middle of the screen
A confirmation box will appear asking "Reboot into BaseUI?"
Tap "OK"
The device will reboot into BaseUI. Bluetooth is now functional and you can connect from the Meshtastic App.
Switching from BaseUI to MUI (Disables Bluetooth)
Tap the screen to scroll through the menu to the Gear icon, then press the Return key
Tap the screen to scroll down to "Reboot/Shutdown", then press the Return key
Tap the screen to scroll down to "Switch to MUI", then press the Return key
On the "Switch to MUI?" confirmation screen, tap to scroll down to "Yes", then press the Return key
The device will reboot into MUI. You now have the graphical interface but Bluetooth connectivity is no longer available.
LoRa Configuration for T-Deck Plus
The T-Deck Plus requires proper LoRa configuration to communicate with other Meshtastic nodes. Configure these settings through the Meshtastic App after pairing.
A common mistake is not setting the frequency slot correctly.
Essential LoRa Settings
Settings → Radio configuration → LoRa
| Setting | Recommended Value | Why |
|---|---|---|
| Region | US (or your local region) | Must match your geographic location for legal operation |
| Frequency Slot | 20 (US LongFast default) | Ensures your device is on the correct frequency for your mesh |
| Preset | Long Range - Fast | Default for most regional meshes. Change only if your mesh uses different settings. |
The T-Deck Plus will reboot automatically when you save LoRa configuration changes.
Frequency Slots by Region and Preset
| Region | Preset | Frequency Slot |
|---|---|---|
| US | LongFast | 20 |
| US | ShortTurbo | 50 |
| EU_868 | LongFast | 1 |
| EU_433 | LongFast | 1 |
For a complete list of frequency slots by region, see the official Meshtastic radio settings documentation.
Device Role Configuration
The T-Deck Plus can operate in different device roles depending on your use case.
Recommended Roles for T-Deck Plus
Settings → Device configuration → Device → Device Role
| Role | Use Case | Notes |
|---|---|---|
| CLIENT | Standard operation | Default role. Good for general use. |
| CLIENT_MUTE | Mobile operation | Device can send/receive messages but doesn't relay them. Useful for mobile nodes. |
| CLIENT_BASE | Fixed infrastructure node | Prioritizes messages for favorited nodes. Use only if T-Deck is in a fixed location with reliable power. Can be used to take advantage of Zero-Cost Hops. |
| TAK | ATAK integration | For T-Deck Plus paired with ATAK via Bluetooth. See ATAK integration guide. |
Troubleshooting Common Issues
No Nodes Visible
Symptoms: T-Deck shows "no signal" or no nodes appear in the node list even in a known active mesh area.
Solutions to try:
- Verify your Region setting matches your physical location
- Check Frequency Slot matches your local mesh (US LongFast = slot 20)
- Ensure Preset matches your mesh (most use LongFast)
- Verify antenna is properly connected (loose antenna = no reception)
- Try different physical locations - you may be in a dead zone or the mesh may be temporarily quiet
Bluetooth Won't Connect or Drops After Reboot
Symptoms: Can't pair with a device running the Meshtastic App, or connection works initially but fails after device reboot.
Solutions to try:
- Verify you're in BaseUI mode, not MUI
- Remember: Bluetooth works in BaseUI, not in the graphical MUI
- If connection drops after reboot, the device likely rebooted into MUI - switch back to BaseUI
- In BaseUI, the Bluetooth connection persists across reboots
- Clear Bluetooth pairing on phone and re-pair if issues persist
Firmware Flash Fails or Device Won't Boot
Symptoms: Firmware flash appears to complete but device won't boot, or flash process fails.
Solutions to try:
- Use full erase option in flasher.meshtastic.org
- Flash beta firmware, not alpha builds
- Ensure USB cable is properly connected and not a charge-only cable
- Try a different USB port or cable
- On some systems, you may need to install USB drivers - check Meshtastic documentation for your OS
Can't Switch Between MUI and BaseUI
Symptoms: Menu option to switch interfaces is missing or doesn't work.
Solutions to try:
- Ensure you're running firmware 2.7.x or later - older versions may not support both interfaces
- Remember to press and hold the Bluetooth icon when switching to BaseUI, not just tap it
- In BaseUI, use the Return key to confirm selections, not just tapping
- Try a full erase and reflash if interface switching remains broken
Stuck in Bluetooth Programming Mode
Symptoms: Device shows Bluetooth programming interface instead of normal BaseUI or MUI.
Solution:
- Reboot the device by pressing & holding the Bluetooth icon in the middle of the screen
- Bluetooth Programming Mode is for initial pairing/recovery. For normal use, reboot into BaseUI (Bluetooth operating mode) or MUI (standalone maps/UI)
- After reboot, device will return to whichever UI mode it was in previously (MUI or BaseUI)
Offline Maps for T-Deck
One of the most powerful features of the T-Deck Plus in MUI mode is the ability to display offline maps loaded from a microSD card. This gives you visual context for your mesh network without requiring internet connectivity.
- MicroSD card (Amazon affiliate link) → (16GB or larger recommended, formatted as FAT32)
- Python 3 installed on your computer
- Command line / terminal access
- Internet connection for downloading map tiles
Installing the Map Tile Generator
The tdeck-maps tool makes it easy to download properly formatted map tiles for your T-Deck. You should have a functioning Python 3 environment before you begin these steps.
Open a terminal/command prompt and run:
pip install pillow requests
git clone https://github.com/JustDr00py/tdeck-maps.git
cd tdeck-maps
If you don't have git installed, you can download the repository as a ZIP file from GitHub and extract it.
Downloading Map Tiles
Now you can generate map tiles for your area. The tool offers several methods depending on your needs.
Method 1: Single City (Easiest)
Download tiles for a specific city with a 20km buffer (default):
# Basic usage
python meshtastic_tiles.py --city "Tampa" --min-zoom 8 --max-zoom 12

# Cities with spaces (use quotes!)
python meshtastic_tiles.py --city "Salt Lake City" --min-zoom 8 --max-zoom 12

# Specify state for precision
python meshtastic_tiles.py --city "Portland, Oregon" --min-zoom 8 --max-zoom 12
Method 2: Multiple Cities
Perfect for road trips or regional coverage:
# Tampa Bay area
python meshtastic_tiles.py --cities "Tampa; Clearwater; St. Petersburg" --min-zoom 8 --max-zoom 12

# Road trip route
python meshtastic_tiles.py --cities "Los Angeles; Bakersfield; Fresno; San Francisco" --min-zoom 8 --max-zoom 11
Important: Use quotes around the entire --cities argument, and separate cities with semicolons.
Method 3: Predefined Regions
# Entire state
python meshtastic_tiles.py --region florida --min-zoom 6 --max-zoom 10

# Larger regions
python meshtastic_tiles.py --region usa --min-zoom 4 --max-zoom 8
Available regions: north_america, usa, canada, mexico, california, texas, alaska
Understanding Zoom Levels
Zoom levels determine map detail and storage requirements:
| Zoom Range | Use Case | Coverage | Storage (per city) |
|---|---|---|---|
| 4-8 | Continental navigation | Very wide area | 10-50 MB |
| 8-12 | Recommended for T-Deck | Regional detail | 50-200 MB |
| 10-14 | Local/urban navigation | Street-level | 100-500 MB |
| 12-16 | High detail | Building-level | 500+ MB |
--min-zoom 8 --max-zoom 12 for a good balance of coverage and detail that won't fill up your SD card.
Map Types
Choose different map styles with the --source option:
# Standard street map (default)
python meshtastic_tiles.py --city "Tampa" --source osm --min-zoom 8 --max-zoom 12

# Satellite imagery
python meshtastic_tiles.py --city "Tampa" --source satellite --min-zoom 8 --max-zoom 12

# Topographic/terrain (great for hiking)
python meshtastic_tiles.py --city "Tampa" --source terrain --min-zoom 8 --max-zoom 12

# Cycling-focused maps
python meshtastic_tiles.py --city "Tampa" --source cycle --min-zoom 8 --max-zoom 12
Copying Maps to Your T-Deck
Format a microSD card as FAT32. Most 16GB and 32GB cards come pre-formatted this way.
On the SD card root, create a folder called maps. Inside that folder, create a subfolder for each map type you want to use (e.g., osm, satellite, terrain).
SD Card Structure:
/maps/
  /osm/
    /tiles/
  /satellite/
    /tiles/
  /terrain/
    /tiles/
After running the map generator, you'll have a tiles folder in the tdeck-maps directory. Copy this entire tiles folder into your chosen map type folder on the SD card.
For example, if you generated OSM tiles, copy the tiles folder into /maps/osm/ on your SD card.
Safely eject the SD card from your computer and insert it into the microSD card slot on the left side of the T-Deck Plus.
Power cycle your T-Deck (or reboot it). Once in MUI mode, navigate to the Maps section using the navigation tabs.
You may need to zoom out initially to see your map data, especially if you don't have a GPS lock yet.
Real-World Examples
Local Mesh Testing (16GB SD)
python meshtastic_tiles.py --city "Your City" --buffer 15 --min-zoom 10 --max-zoom 13
High detail for your immediate area, good for testing mesh coverage.
Regional Emergency Preparedness (32GB SD)
python meshtastic_tiles.py --cities "Tampa; Orlando; Jacksonville" --min-zoom 8 --max-zoom 12
Covers major cities in your region with good detail.
Hiking/Camping Trip (32GB SD)
python meshtastic_tiles.py --cities "Yosemite Valley; Mammoth Lakes; Bishop" --source terrain --min-zoom 10 --max-zoom 14
Detailed terrain maps for backcountry navigation.
Cross-Country Road Trip (64GB SD)
python meshtastic_tiles.py --cities "New York; Philadelphia; Washington DC; Atlanta; New Orleans; Houston; Austin; Phoenix; Los Angeles" --min-zoom 8 --max-zoom 11
Wide coverage at moderate detail for long-distance travel.
Troubleshooting Maps
Maps won't display:
- Verify SD card is formatted as FAT32
- Check folder structure:
/maps/[map_name]/tiles/ - Ensure you're in MUI mode, not BaseUI
- Try zooming out - you may be zoomed in past your available tiles
- Reboot the T-Deck after inserting the SD card
Black screen when zooming in:
- You've exceeded your downloaded zoom levels
- Either zoom back out or download higher zoom level tiles
Map centered on wrong location:
- Without GPS lock, T-Deck may not know where you are
- Wait for GPS lock, or manually pan the map to your location
- In Maps tab, tap and hold the crosshairs to set position to center of view
"City not found" errors when downloading:
- Always use quotes around city names:
--city "Salt Lake City" - Try adding state/country:
"Portland, Oregon" - Check spelling
Advanced Options
Custom Buffer Size
# Larger coverage area around city (50km instead of default 20km)
python meshtastic_tiles.py --city "Tampa" --buffer 50 --min-zoom 8 --max-zoom 12
Performance Tuning
# Faster downloads (be respectful to tile servers)
python meshtastic_tiles.py --city "Tampa" --max-workers 6 --delay 0.1 --min-zoom 8 --max-zoom 12

# Slower, more conservative (if getting rate limited)
python meshtastic_tiles.py --city "Tampa" --max-workers 2 --delay 0.5 --min-zoom 8 --max-zoom 12
Custom Coordinate Boundaries
python meshtastic_tiles.py --coords --north 28.0 --south 27.8 --east -82.4 --west -82.6 --min-zoom 10 --max-zoom 14
Best Practices for T-Deck Plus Operation
Battery Management
- The T-Deck Plus has an internal battery, but heavy use (especially as a ROUTER) drains it quickly
- For extended operation, connect to a portable battery bank (Amazon affiliate link) → or a portable solar panel (Amazon affiliate link) →
- Screen brightness significantly affects battery life - adjust in settings
- BaseUI mode uses less power than MUI mode
Antenna Considerations
- Always ensure the LoRa antenna is properly screwed on before powering up
- Operating without an antenna can damage the radio
- For optimal range, keep the antenna vertical and unobstructed
- Consider upgrading to a higher-gain antenna for fixed installations
Firmware Updates
- Backup your channel configuration before flashing new firmware
- Use the QR code feature in the Meshtastic App to save your channel settings
- Perform a full erase when major version changes occur (e.g., 2.6.x to 2.7.x)
- Stick with beta releases unless you need specific alpha features
When to Use Which Interface Mode
- Use MUI when: Operating as a standalone device in the field, you want visual interface, you don't need phone app connectivity
- Use BaseUI when: You want to use the Meshtastic App, you need Bluetooth connectivity, you're configuring the device via phone app, you want longer battery life
- Remember: You can switch between modes anytime - use whichever fits your current operational needs
Additional Resources
For more information on Meshtastic and T-Deck configuration:
- Official Meshtastic Documentation
- Meshtastic Web Flasher
- Radio Settings and Frequency Slots
- ATAK Integration Guide - If using T-Deck with ATAK
- If you are experiencing issues, check our Gotchas & FAQ
- Contact Us - Get help with your setup
Summary
The T-Deck Plus is a versatile and powerful Meshtastic device once you understand its quirks. The key takeaways:
- Use beta firmware, not alpha builds
- MUI = nice visuals but no Bluetooth; BaseUI = Bluetooth works but simpler interface
- Switch between modes as needed for your operational requirements
- Verify frequency slot matches your local mesh
- Ensure region setting is correct for your location
- Always connect the antenna before powering on
- Load offline maps to maximize MUI mode utility
With proper configuration and offline maps loaded, the T-Deck Plus becomes an excellent standalone Meshtastic node with full situational awareness. You can see your mesh network overlaid on actual maps without requiring any internet connectivity. Take the time to learn both interface modes, understand when to use each one, and prepare your offline maps before heading into the field.
Test thoroughly. Practice regularly. Know your gear.