Why Meshtastic?
Meshtastic lets you send encrypted text messages and location data without cell service, internet, or even a license. Each device acts as a mesh node, relaying messages through the network. The more nodes, the farther your messages travel.
It's the fastest way to get connected to resilient neighborhood comms. No test, no paperwork, no waiting. Get a device, configure it, and boom you're part of the mesh.
Powering on a Meshtastic device without an antenna attached can permanently damage the radio. ALWAYS connect the antenna BEFORE inserting battery or USB power. If your device has an internal antenna, this is less of a concern. Why this can damage your device →
Choosing Your Device
Meshtastic runs on various hardware platforms. The "best" device depends on your use case. Do you want to use the Meshtastic App to send your messages? Do you want a standalone device that doesn't need an app? Do you want something tiny you can clip to a backpack? How about a solar-powered node that runs indefinitely? Below are our recommendations for different scenarios.
Recommended Devices
Seeed T1000-E Card Tracker (Lowest Cost Option)
Best for: Cost-effective, pocket carry, water resistant, low profile
- Extremely compact; fits in a wallet or pocket
- Water resistant (IP67 rating)
- Long battery life due to minimal power draw
- Lightweight and durable
- Great for hiking, outdoor activities, or everyday carry
- Integrated GPS for position tracking
- No screen; must use a device with the Meshtastic App to interact
- Magnetic "smart watch" style charging cable, not USB-C like everything else
LilyGo T-Deck Plus (All-In-One Device)
Best for: Standalone operation, no app/phone needed
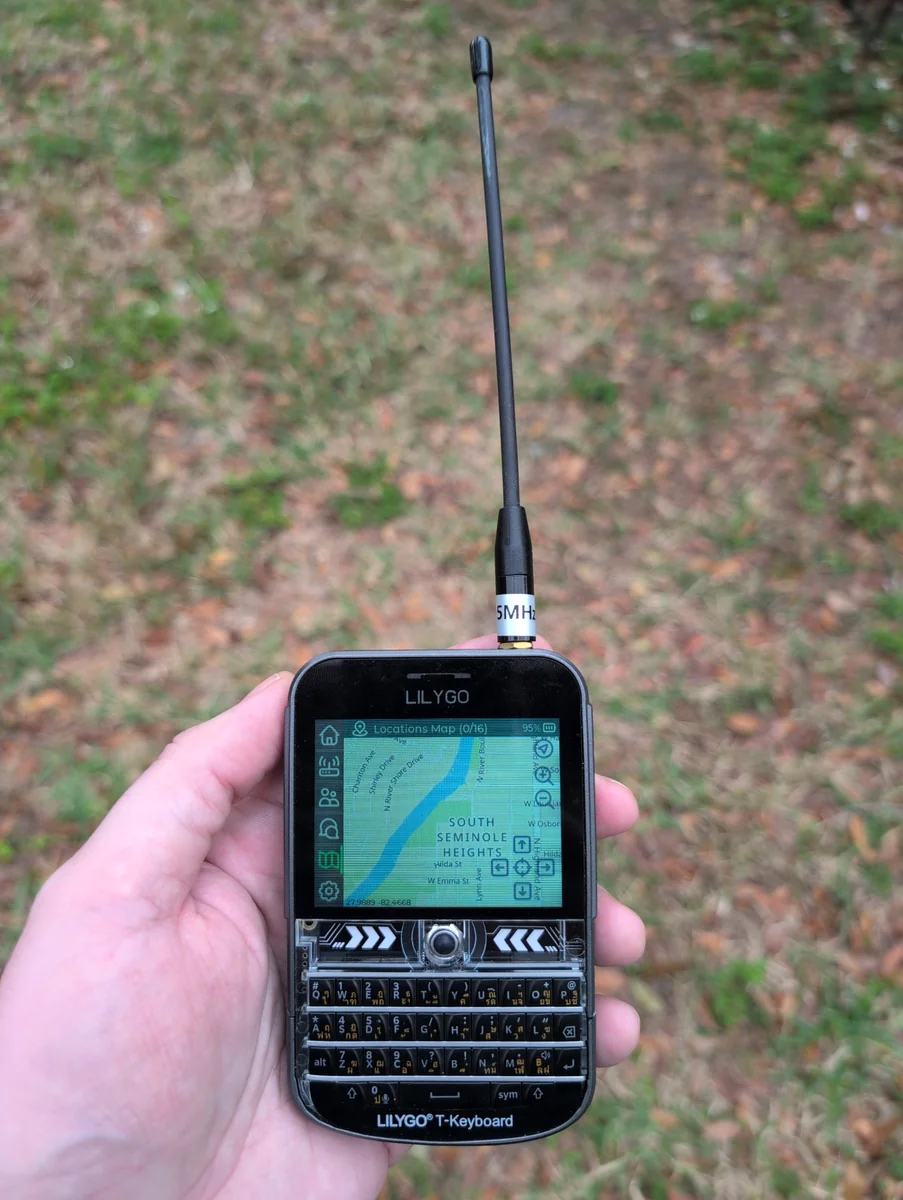
- Built-in screen and keyboard; fully standalone
- No need to pair with a phone or computer
- Can send and receive messages directly from the device
- Integrated GPS, can display offline maps
- Great for operators who want simplicity and independence
- Ideal for people who don't want to drain their phone battery
- Larger and bulkier than some other devices
- Battery life shorter than simpler nodes due to screen usage
- Keyboard takes some getting used to
Buy a LilyGo T-Deck Plus (Amazon affiliate link) →
Buy a MicroSD card for offline map storage (Amazon affiliate link) →
Create T-Deck Offline Map Tiles →
For configuration tips, see our Advanced Guide on Configuring the T-Deck Plus
SenseCAP Solar Node P1 Pro (Powered By The Sun)
Best for: Fixed installations, always-on nodes
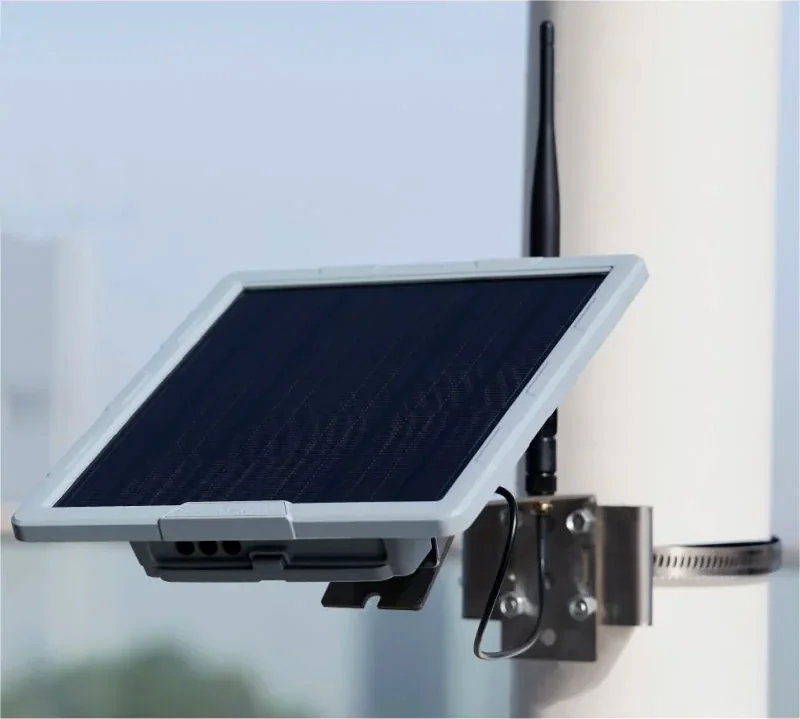
- Solar powered; runs indefinitely without maintenance
- Weatherproof enclosure for outdoor deployment
- Built-in battery keeps it running through nights and cloudy days
- Great for extending mesh coverage in remote areas
- Set-it-and-forget-it reliability
- Perfect for rooftop or tower installations
- Not portable
- Higher upfront cost
- Overkill for personal carry
- Requires good mounting location with sun exposure
DIY Solar Nodes
If you want to build your own solar-powered node for less money (and more learning), check out the Austin Mesh guide. It walks through sourcing components, wiring, weatherproofing, and deployment. You'll end up with a custom node tailored to your exact needs.
Austin Mesh DIY Solar Node Guide →
General Recommendations
Start simple. If you're new to Meshtastic & want the best learning experience, pick up a pair of T1000-E's. Put one up high in a window using the "CLIENT_BASE" role, and carry the other around with you in the "CLIENT_MUTE" role. Add each device to the other's "favorites". Having two devices allows you to send messages back and forth and learn how the network behaves. Once you understand the basics, you can expand with solar nodes, repeaters, or more exotic setups.
Deploy strategically. One solar node on a rooftop or hilltop can extend your mesh significantly. Fixed nodes should go where they can see the farthest, not just where they're convenient to install.
Mesh density matters. The more nodes in an area, the more reliable the network becomes. Encourage neighbors to add nodes. Even a basic mesh device in someone's window can bridge critical gaps.
Next Steps
Once you have a device, download the Meshtastic App (iOS, Android, or desktop), pair it via Bluetooth, and set your device's region. The default "LongFast" channel will connect you to other nearby nodes automatically. It's a good idea to leave the device on for a couple of days and then check it. From there, experiment with settings, test range, and start building your local network.
See if there is a local Meshtastic group near you.
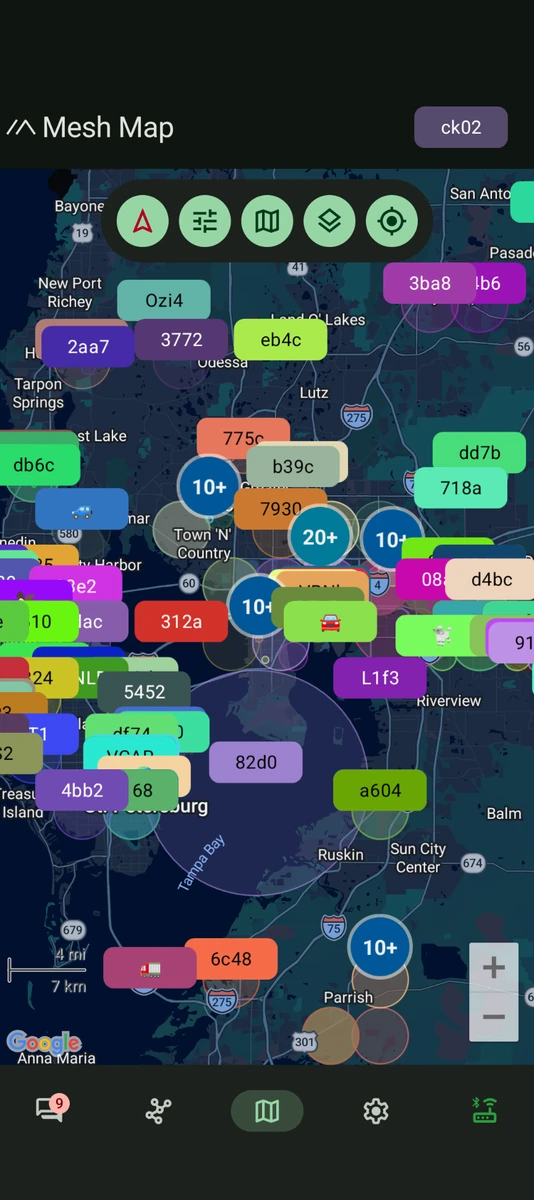
Use MeshMap to find meshes near you (Note: This tool does not show all mesh nodes, just ones that are connected to public channels on the internet via MQTT & share their position).
Read our Advanced Guide on Configuring the T-Deck Plus
For more advanced configuration, check the official Meshtastic documentation.
If you are experiencing issues, check our Gotchas section or FAQ page.
ATAK Integration
The Meshtastic ATAK Plugin enables seamless integration between the Android Team Awareness Kit (ATAK) and Meshtastic mesh networking devices. Share position location information (PLI), chat messages, and data packages over Meshtastic's long-range, low-power mesh network.